3 Awesome Custom Shapes You Can Create in PowerPoint
3 Awesome Custom Shapes You Can Create in PowerPoint
Ditch the old ways of adding Smart Art or just text to your presentation. Use these amazing custom shapes and make your next presentation a big hit.
We are going to teach you to create 3 awesome custom shapes for your next presentation.
What you will learn to create in this tutorial:
Steps to create cool custom shape 1:
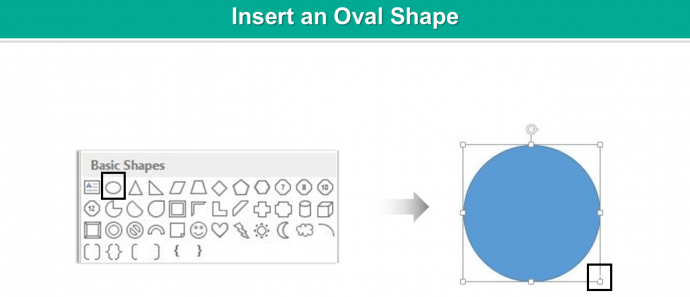
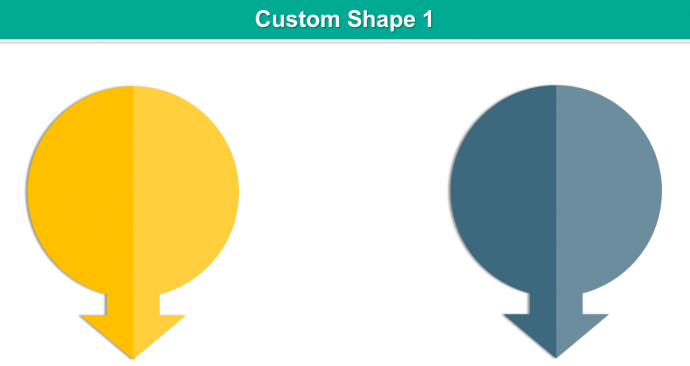
- Insert an Oval shape. Go to Insert> Shapes> Basic Shapes> Oval Shape. Adjust its size by holding the marked cursor. Remember to press Control Shift while dragging the cursor to get a symmetrical oval shape.
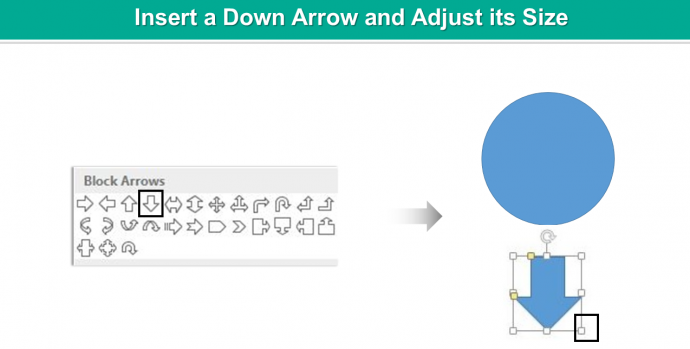
- Add a Down Arrow. Go to Insert> Shapes> Block Arrows> Down Arrow. Increase the size of the down arrow with the help of the cursor. (See the below image).
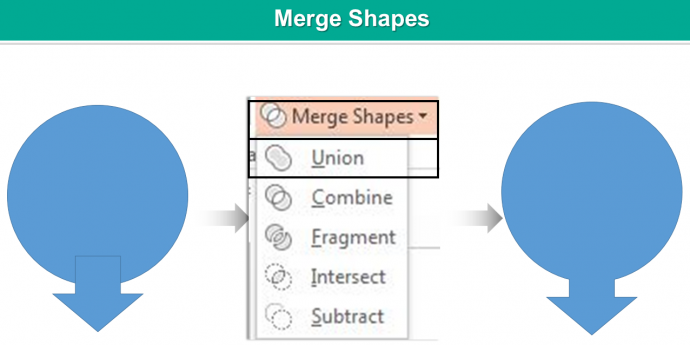
- Now place the down arrow over the circle. (See the below image). Select the circle first, then the down arrow. Go to Format> Merge Shapes> Union.
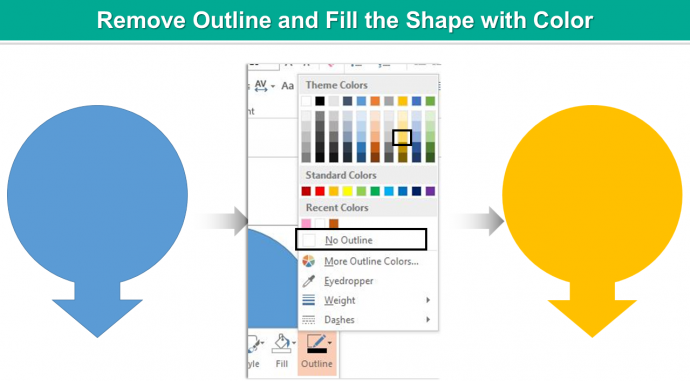
- Right click the shape, remove the outline and fill the shape with the color of your choice.
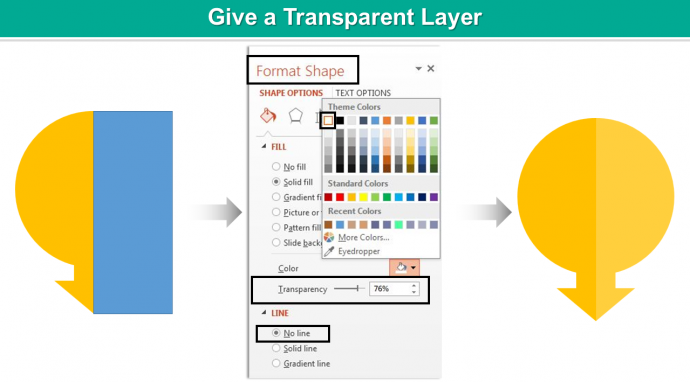
Add a transparent layer to give it a more professional look.
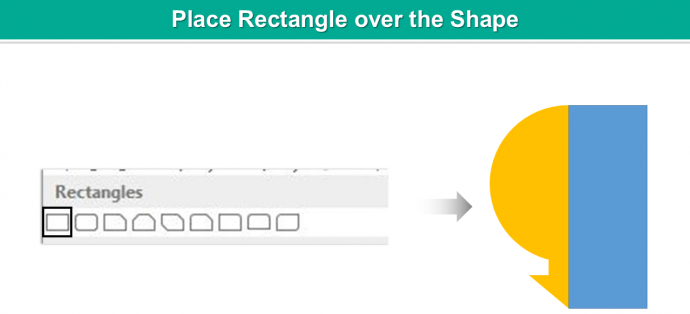
- Place a Rectangle over the shape. Go to Insert> Shapes> Rectangles> Rectangle.
- Right click the Rectangle, Format Shape> Fill> Solid Fill> White color> Increase its transparency> Line> No Line.
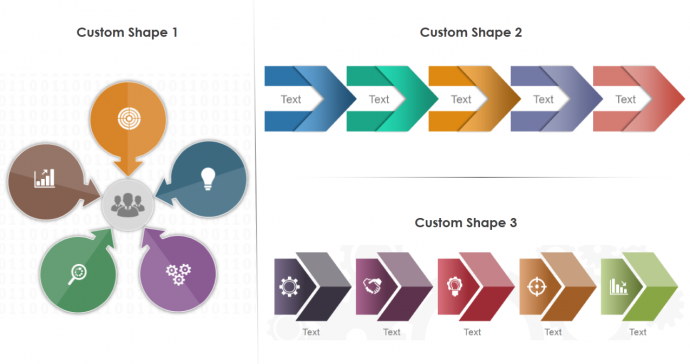
Custom Shape 1:
Steps to create cool custom shape 2:
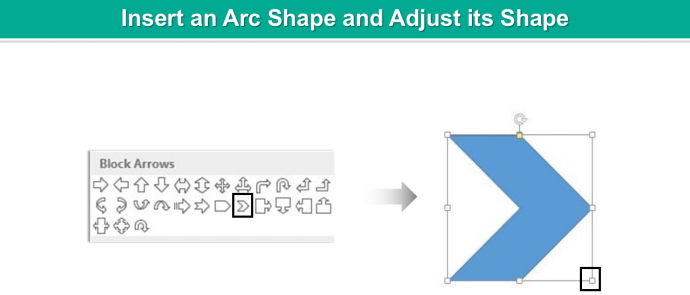
- Insert an Arc shape. To do so, click Insert> Shapes> Block Arrows> Arc Shape. Adjust its size by holding the highlighted cursor.
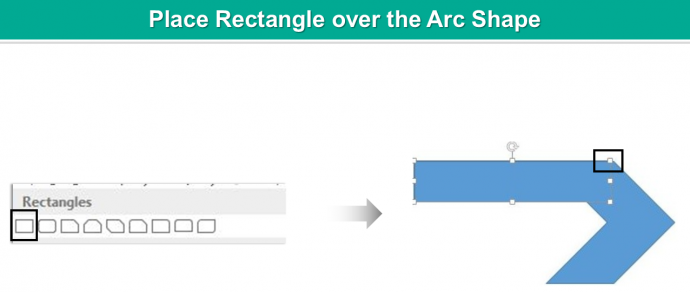
- Place a Rectangle over the arc shape. (See the below image).
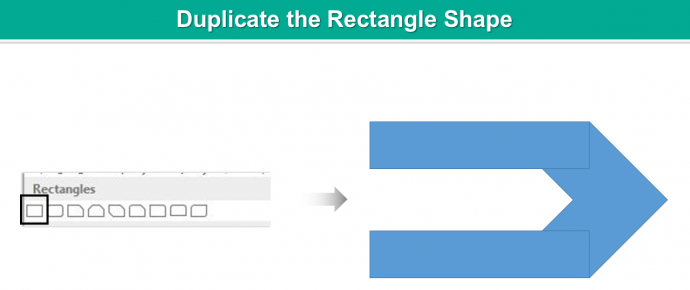
- Select the rectangle you have placed. Press Control C and Control V to duplicate the shape. Place the second rectangle at the bottom of the arc shape.
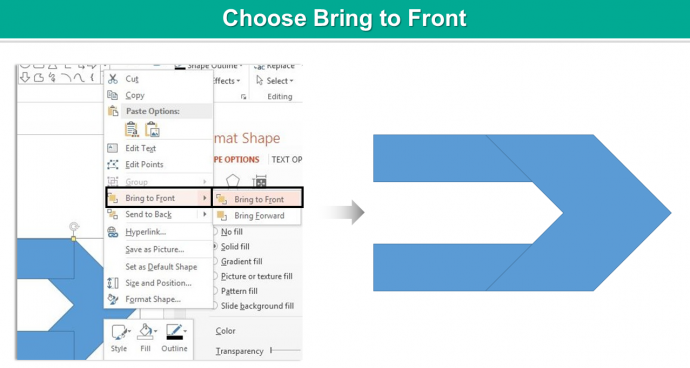
- Right click the arc shape, choose Bring to Front.
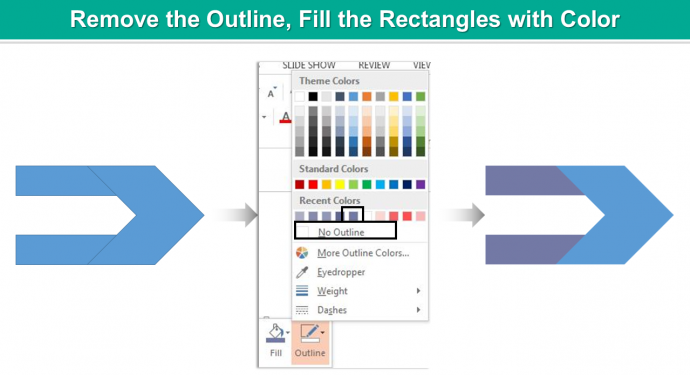
- Right click the Rectangles, select No Outline. Fill them with the color of your choice.
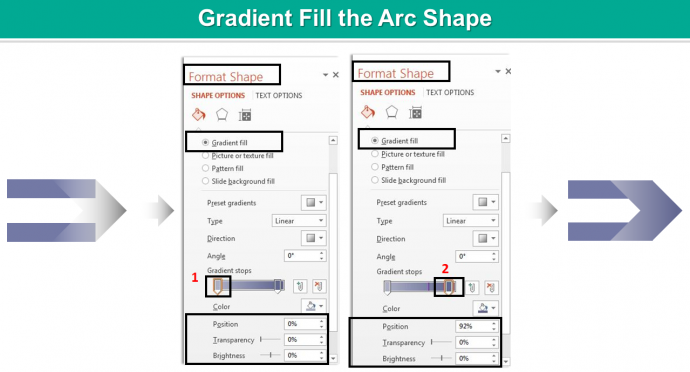
- Right click the Arc shape, go to Format Shape> Shape Options> Fill> Gradient Fill. Keep two gradient stops. Select the gradient stop 1 and fill the shape with color of your choice. Keep the position of the gradient stop 1 to 0%. Select the 2nd gradient stop, fill the shape with the color. Keep the position of the gradient stop 2nd to 92%.
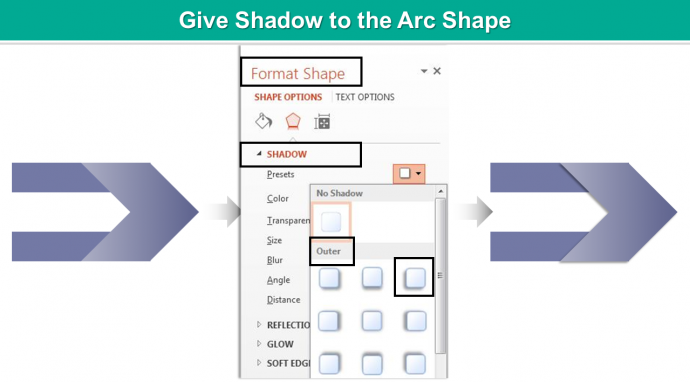
- Once the arc shape is filled with color, right click the shape, go to Format Shape> Shape Options> Effects> Shadow> Outer> Offset Diagonal Bottom Left.
Custom Shape 2:
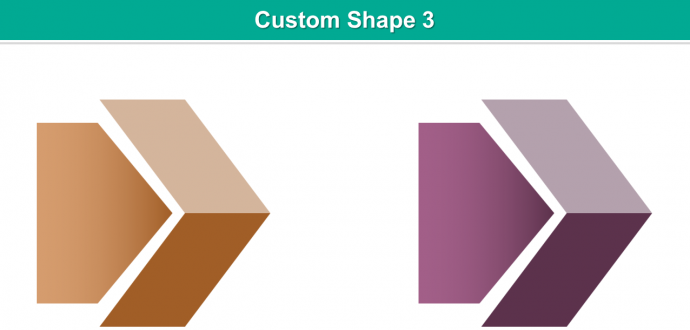
Steps to create cool custom shape 3:
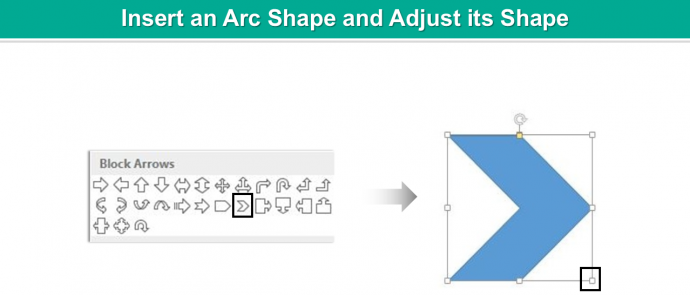
- Insert an Arc shape. Go to Insert> Shapes> Block Arrows> Arc Shape. Adjust its size with the help of the displayed cursor.
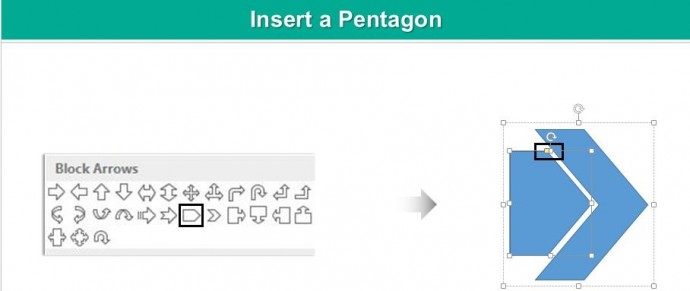
- Insert Pentagon. Click Insert> Shapes> Block Arrows> Pentagon. Adjust its size and length using the highlighted and yellow cursor.
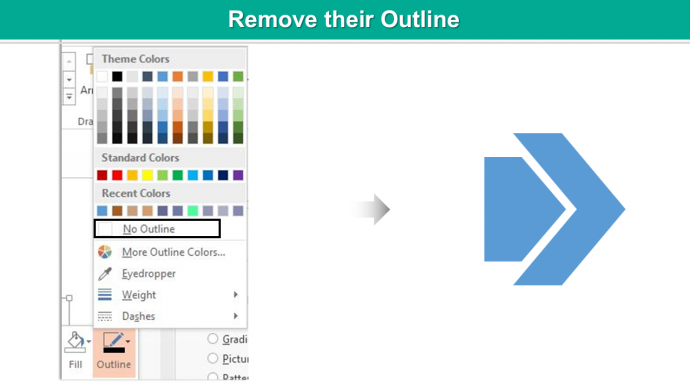
- Remove the outlines from both the shapes. Right click both the shapes, choose No Outline.
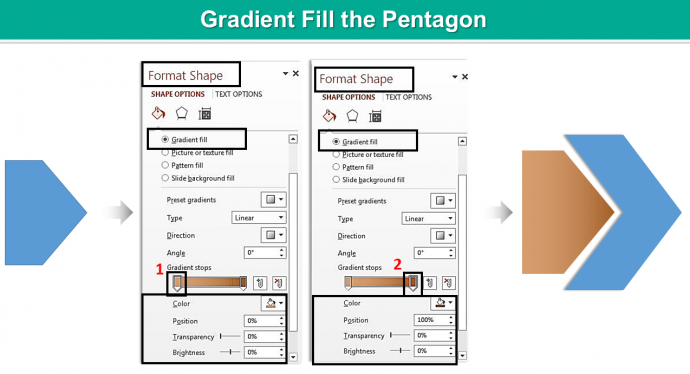
- Right click the pentagon, go to Format Shape> Shape Options> Fill> Gradient Fill. Keep two gradient stops. Fill the shape by selecting each gradient stop.
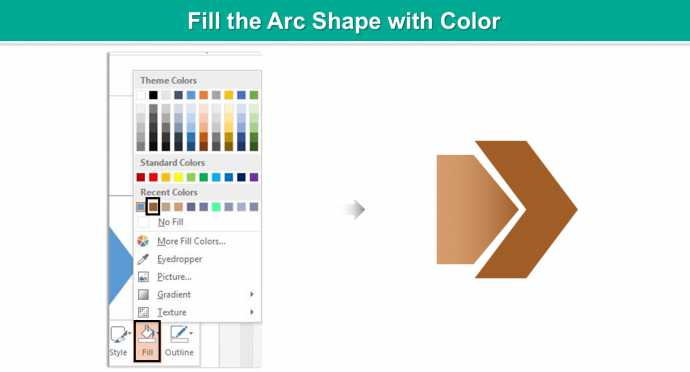
- Right click the Arc> Fill> Choose the color of your choice.
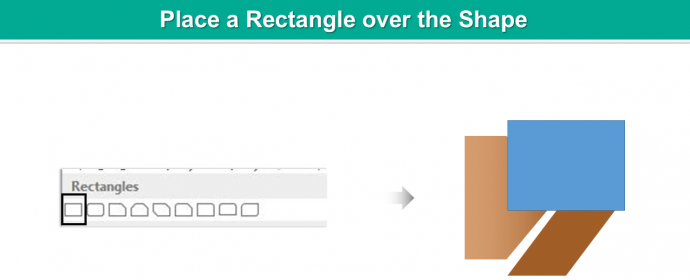
- Add Rectangle over the arc shape in a way that it covers the half of the arc. Go to Insert> Shapes> Rectangles> Rectangle.
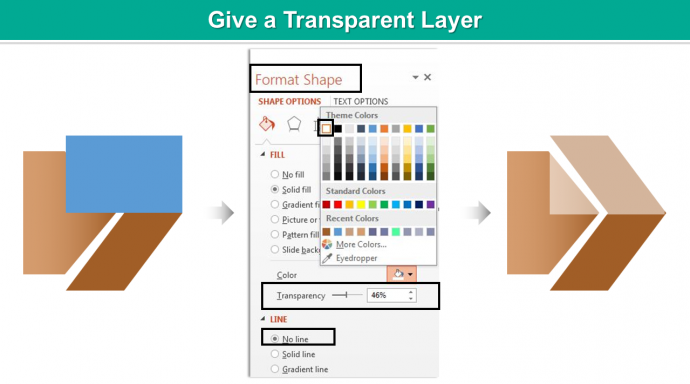
- Right Click the rectangle, go to Format Shape> Shape Options> Fill> Solid Fill> White Color> Increase the Transparency points. Go to option Line under the fill option. Choose No Line.
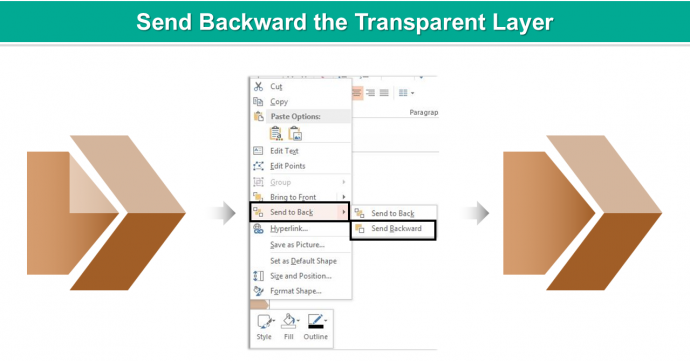
- Right click the Rectangle, choose send backward.
Custom Shape 3:
Create these simple yet awesome custom shapes by yourself and bag all the accolades from your boss.
Good luck!






0 Comments